Configuring Selenium With Eclipse
Before moving to this step, It is assumed that you have eclipse already installed on your system as explained in the post.
Note: It might take a little time to load all the images as there are many.
Downloading Selenium jars:
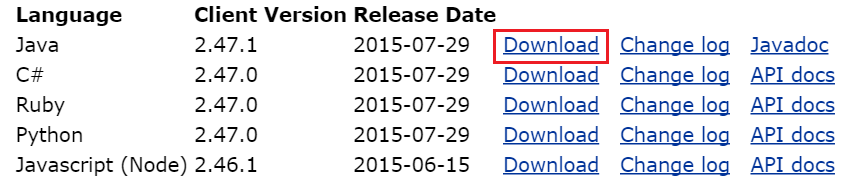
It will be better to call it Selenium configuration, instead of Selenium Installation. Selenium is basically a set of jars which can be downloaded from here (this is official site for selenium).
Go to this above mentioned site, at the download page you will see a Download link with the particular language , its version and release date. Once you click on download link, a zip file will be stored in you system. Unzip it and these are selenium jars file.
Configure Selenium jars with eclipse project:
For configuring selenium, let’s follow below mentioned steps.
- Open Eclipse and Create a java Project
- Add Selenium jars to your project
1. Open Eclipse and Create a java Project:
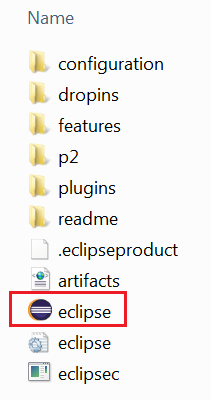
To open eclipse, go to the folder where you have kept the downloaded eclipse files and click on the file highlighted in the screen below.
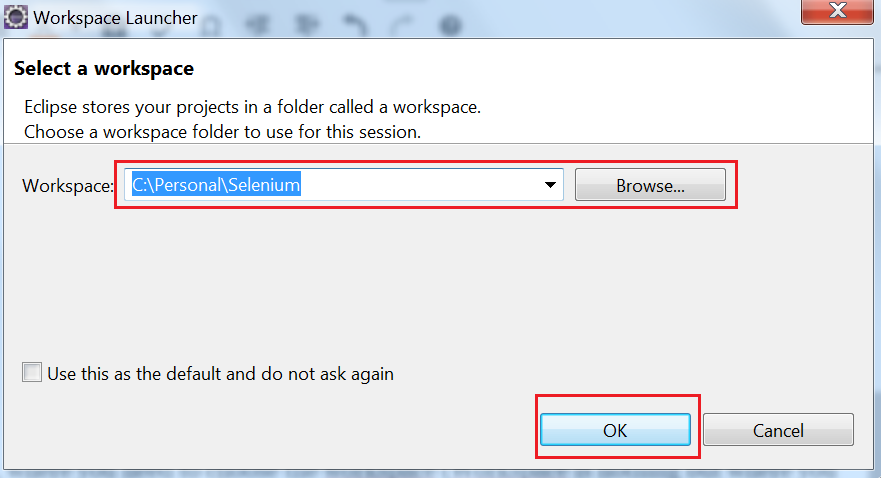
It will open a window, where you need to choose the workspace (Workspace is nothing but where you will store all the projects). You have option to browser for a desired location and after selecting the location ,click OK
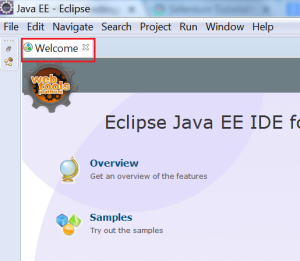
It will open a welcome page , where it contains some information like samples, eclipse tutorials etc. As of now, you can close this window as shown below.
At the first instance, you might get the window shown below. It will be having the project explorer selected as shown in the screen shot. We need to select the “Package Explorer” instead of “Project explorer”. For that, you need to click on a link shown at the right top corner(Highlighted in red).

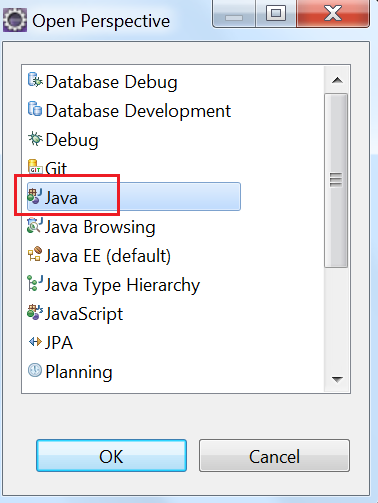
A new window will open where you need to select java option in that.Click OK and it will open a “Package explorer”. This is where we will create our projects.
Eclipse in Package Explorer View:
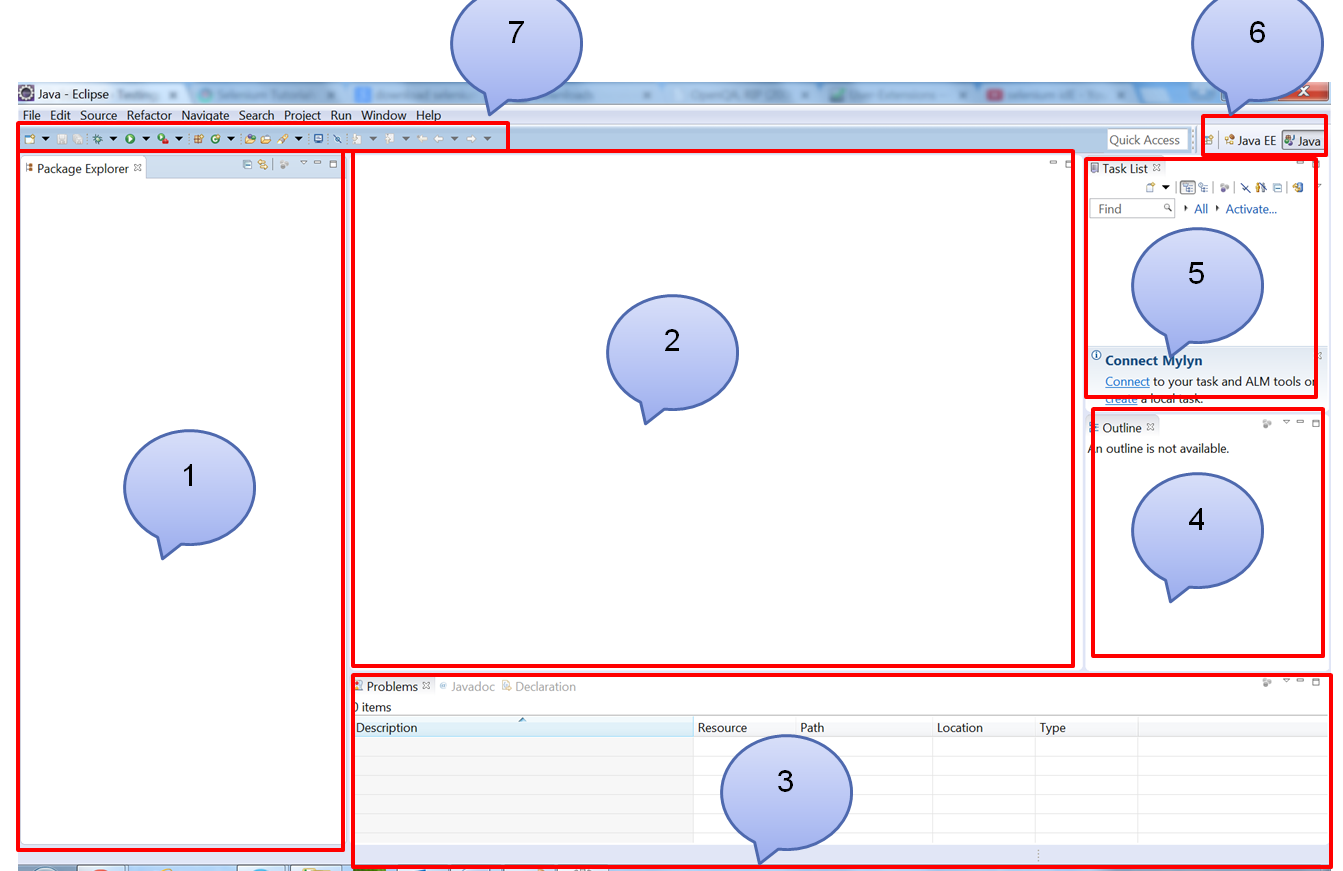
- Package Explorer: Here we will create the projects containing packages, classes, folders, files etc.
- Editor: It is used to write the java code.
- Here , you can attach console, properties pane, java doc pane etc. to see output, errors if any.
- Outline: This view will shown outline of structured file that is currently opened in editor.
- Task List: The Task List is part of Eclipse Mylyn and contains tasks that are downloaded from popular bug trackers like Bugzilla, Trac, Mantis, etc.It is basically used to view and manage the tasks.
- Explorer view selection: We can select the desired view like “package explorer” or “project explorer” etc.
- Tool Bar: It provides all short cuts like execute code, debug code, New button to create a new item like project, class,folder etc, save buttons, Save all etc.
Create a new Project in Eclipse:
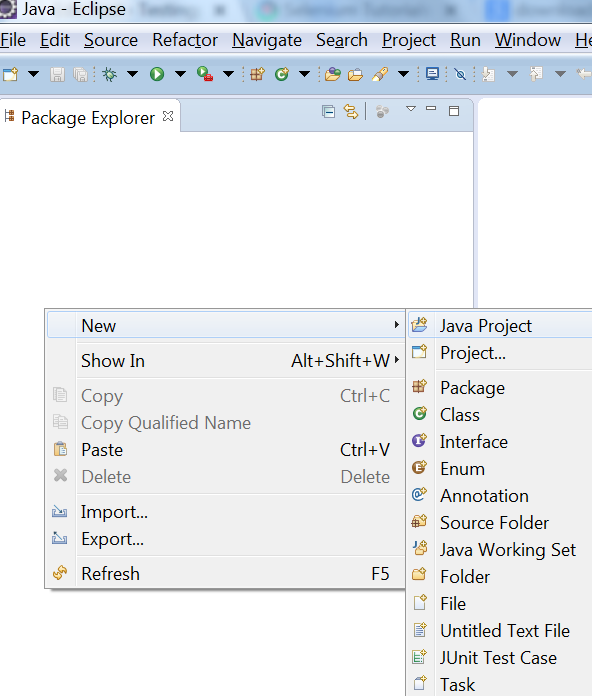
Right click in the “Package Explorer” and select New–> Java Project.
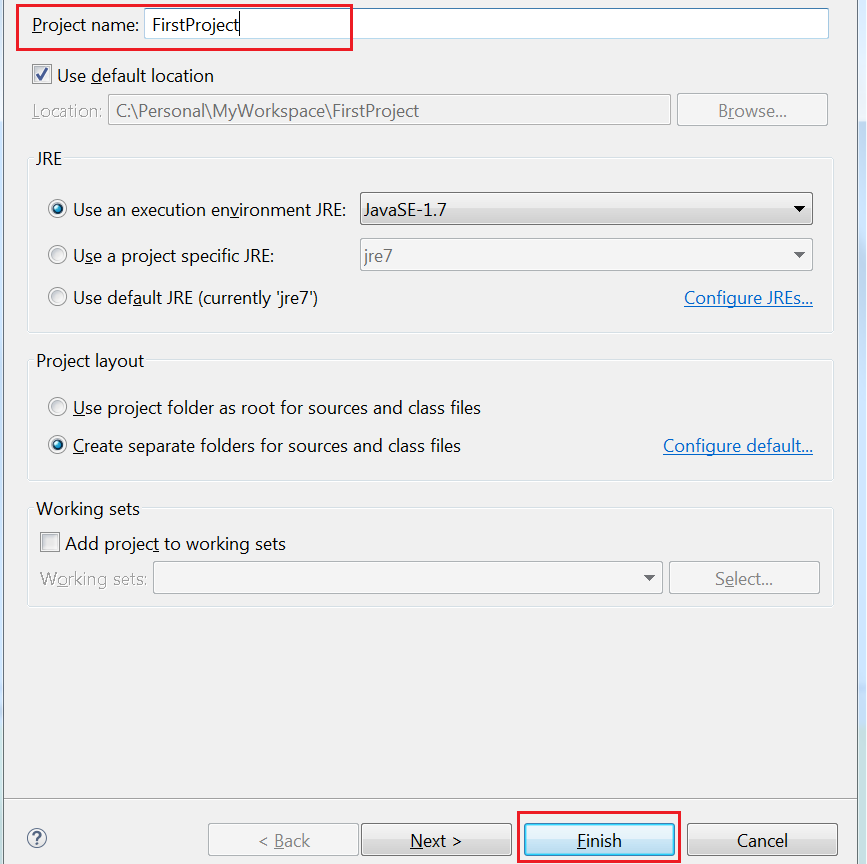
A new window will open as shown below. Give the desired name in the “Project Name” field and click ‘Finish’.
A project will be added in the “package Explorer” that will contain a src folder and JRE system library.
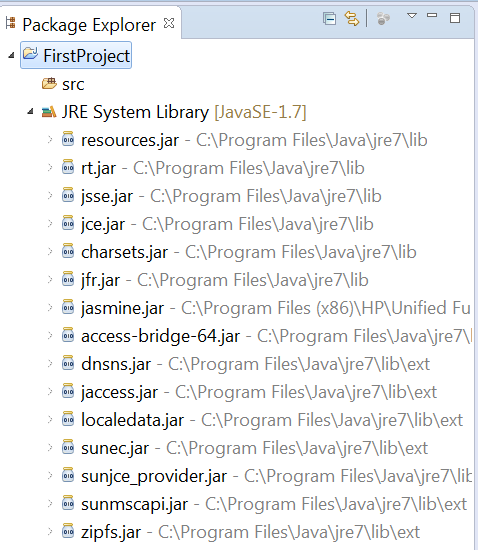
If you got the above view, that means project is created successfully.
2. Add Selenium jars to the project:
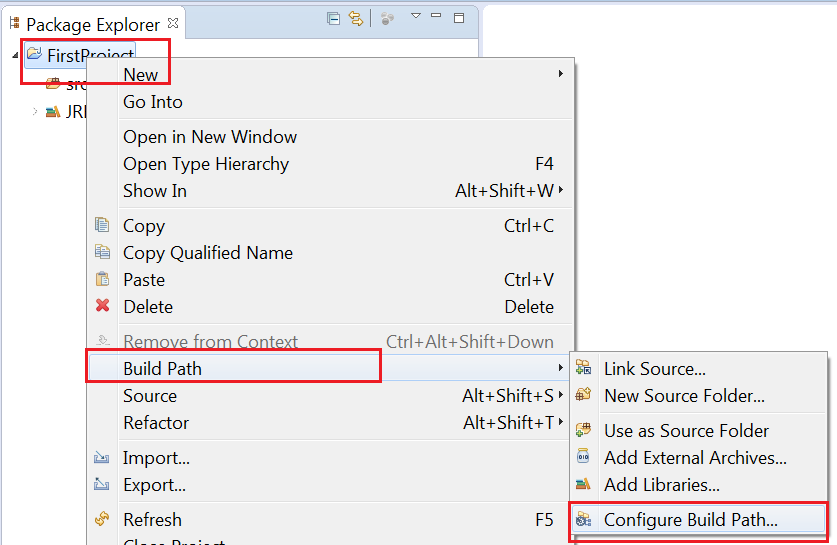
Right click on the project –> Go to Build path –> Configure Build path. (as shown in figure).
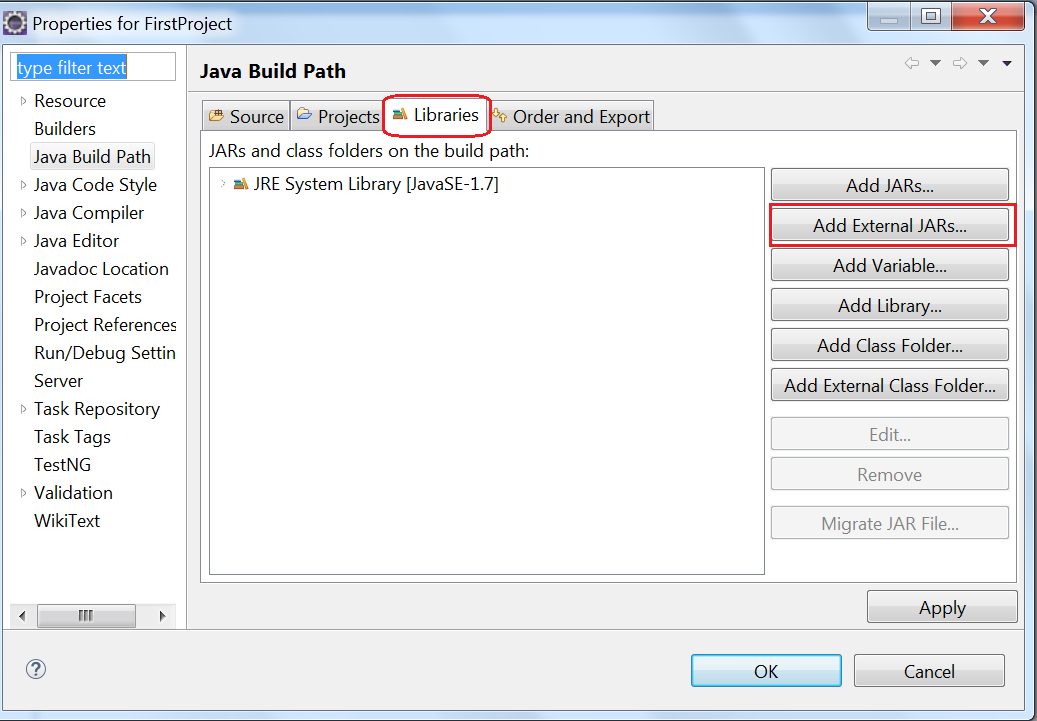
A new window will open, Go to ‘Library tab’ and click on button ‘Add External Jars’ as shown in the figure below.
After clicking ‘Add External Jars’ , It will open a new window where you can browse to the folder which is having all Selenium jars files. Selenium jars which are required to add shown in the below screen shot. Add those 2 jars and all the jars inside lib folder.
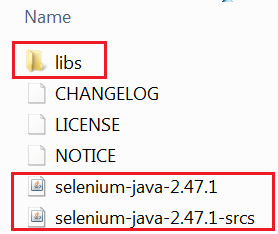
After selecting all jars, Click OK button.
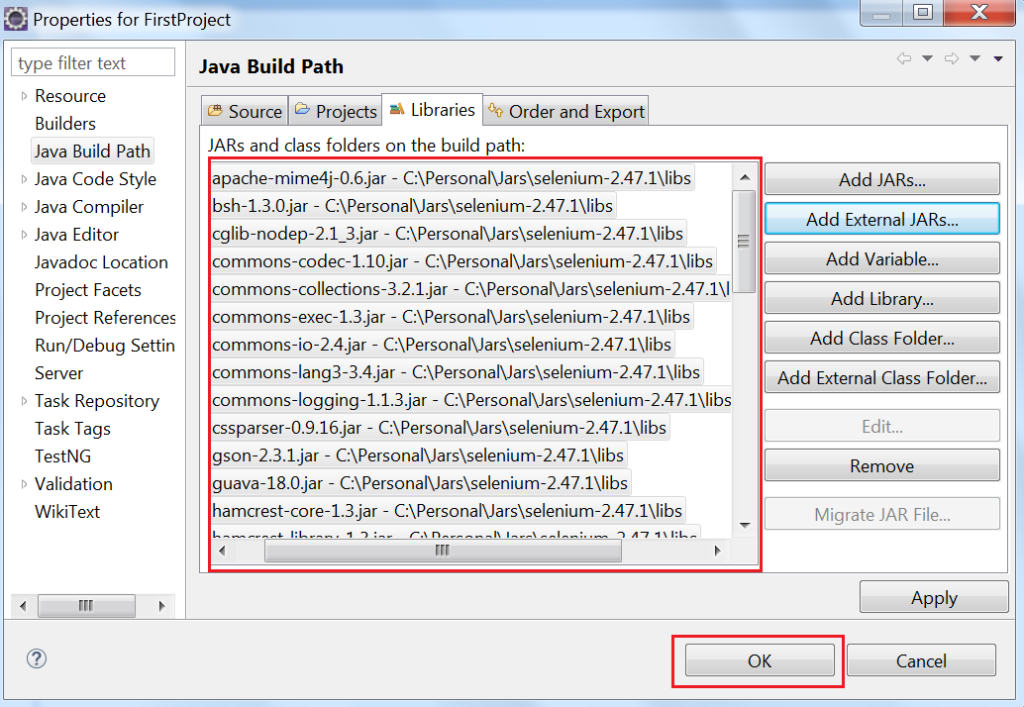
Finally, all the external jars should be displayed inside a folder named ‘Referenced Libraries’. If you are able to see that, then You are ready to start Selenium.


3 Responses
[…] the previous post, we have seen How to configure selenium with Eclipse? In this post, we will see the usage and importance of developer […]
[…] It is assumed that you have already installed and configure selenium with Eclipse and create a project(Explained here.) […]
[…] Eclipse. It is assumed that you have already configure Selenium as already explained in the earlier post.We will perform login functionality in Gmail application. To start with this, we need to perform […]