Configure Hub and nodes in Selenium Grid
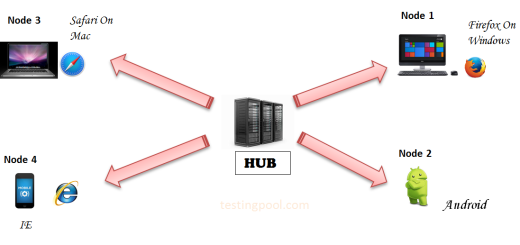
In the previous post, we have see what is Selenium Grid? In this post, let’s see how to Configure Hub and nodes in Selenium Grid.
Download Selenium Server jar:
Download Selenium Server jar file from Selenium official site http://www.seleniumhq.org/download/. Download the latest version and store it at any desired path in your system.

Configuring Hub:
Step#1 Open command prompt and navigate to the system location where you have stored Selenium Server jar file.
cd C:\MyFolder
Step#2 Once you have navigated to the correct path, start the Hub by using the following command.
After you run the above command , hub will start. If you will see the below message , that means hub has started successfully.

Another way you can check the status in the browser by using the command http://localhost:4444/grid/console.

Configuring nodes:
Step#1 Now, Hub is up and running properly. For starting a node, open a new command window and navigate again to the system location where you have Selenium server jar file. Then type the below command to start a node.

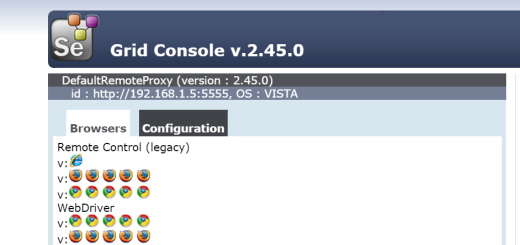
Step#2 To check the node status , go back to http://localhost:4444/grid/console in the browser. You will see no. of browsers for Selenium RC and Selenium Webdriver.
You will see 5 chrome, 5 Firefox and 1 Internet explorer.

These are the browser instances which will be used to execute the test cases in parallel.
If you want to have specific browsers as per your requirement, you can specify it while starting the node. Another important point is that you can choose the port number for the node.
Suppose, we want to start 3 Firefox browser and 1 internet explorer instances at the port 5556. Then open a new command window and run the below command.
Here , we are specifying firefox and IE with -browser browsername and it will open the particular no. of browser as defined in keyword ‘maxinstance‘.
Refresh the web interface http://localhost:4444/grid/console.

Registering chrome instance at a node: For starting Chrome browser, open a command window and run the below command. We are opening chrome instances.
In the above command we are setting the chrome path to “Dwebdriver.chrome.driver“.

Important point to note is that while setting up the node , you can decide how many browsers you want to open for execution at a time. This parameter can be set by using the keyword maxsession.
For example: We are defining that only 2 browser session should open at time.
In the next post , we will see how to use Json file to start a node.


