Selenium IDE part 1
Before moving ahead, let’s see what we will be covering in this part of selenium tutorial. In this tutorial. we will learn about Selenium IDE (Integrated development Environment) from scratch like installing Selenium IDE , explanation about each and every features. At the end of this tutorial, reader should be able to write a script using Selenium IDE.
Selenium IDE is a Firefox plug-in which is more famous as a record and playback tool like the one exist in UFT/QTP. It is easy to install and can be considered as a good start point for those who are new to automation. It might also help to understand the selenium script syntax.
The good point is that user is not required to posses prior programming knowledge to start with Selenium IDE. It is better if one has a bit understanding of HTML, DOM and javascript.
In this part, we will discuss about installation of Selenium IDE , its features and menus in detail. In next part 2, we will see how to create test case, test suite, commonly used methods etc.
Points to be covered in this tutorial:
- Installation of Selenium IDE
- Explanation of menus and features
- Create a new Test case
- Create a Test suite
- Commonly used methods
- Assert and Verify commands
- Echo, Store,StoreEval and storedVars in Selenium IDE
- User Extension
- Writing a simple program in javascript and use that in Selenium IDE
Let’s start it.
1. Installation of Selenium IDE:
For installing Selenium IDE, make sure you have Mozilla Firefox already installed on your system. You can download it here.
Once you have Firefox installed, next step is to go to this url http://www.seleniumhq.org/download/ to download Selenium IDE. We should be on download page where we need to click on the version link as shown in the figure below.
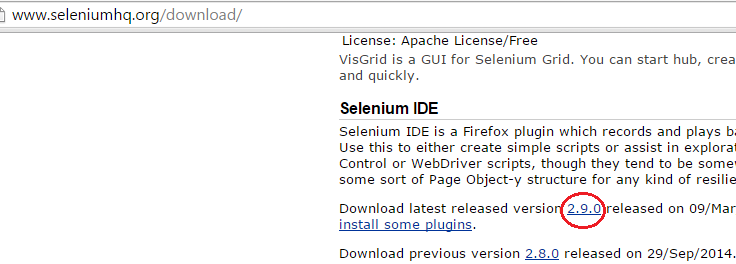
We can download the latest version released.
Once click on the download lick shown above, a pop will appear with a button named “Allow” (as shown in the below figure).
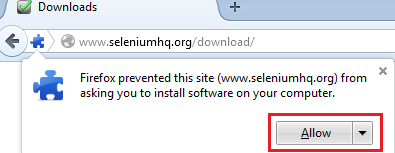
Click on Allow button , it will give one more window with an install Now button.

Click on the Install Now. After installing, it will give you the option to restart the browser(as shown below). Restart the browser, then only Selenium IDE will be installed successfully.

After restarting browser, you can find the Selenium IDE under Tools option as shown in the figure below.

You can click on Selenium IDE to open it.
2. Explanation of menus and features:
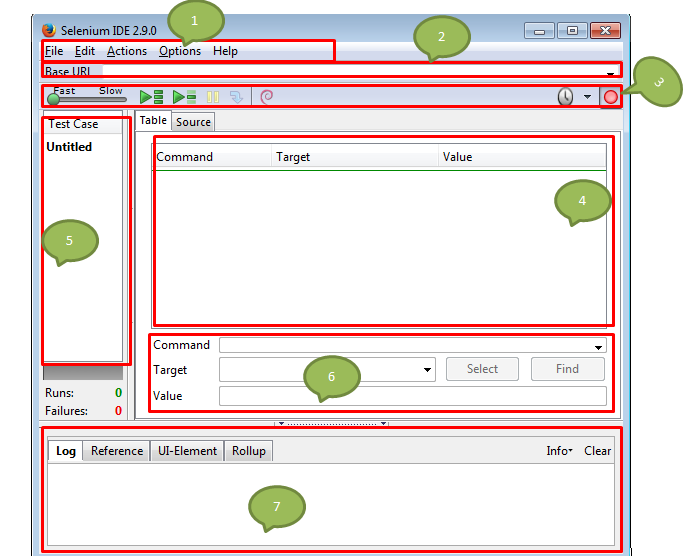
- Menu Bar
- Base URL
- Tool Bar
- Script Editor
- Instruction boxes
- Test Case Pane
- Logging Pane
1. Menu Bar:
Menu Bar has the following items mentioned below.
- File Menu
- Edit
- Actions
- Options
- Help
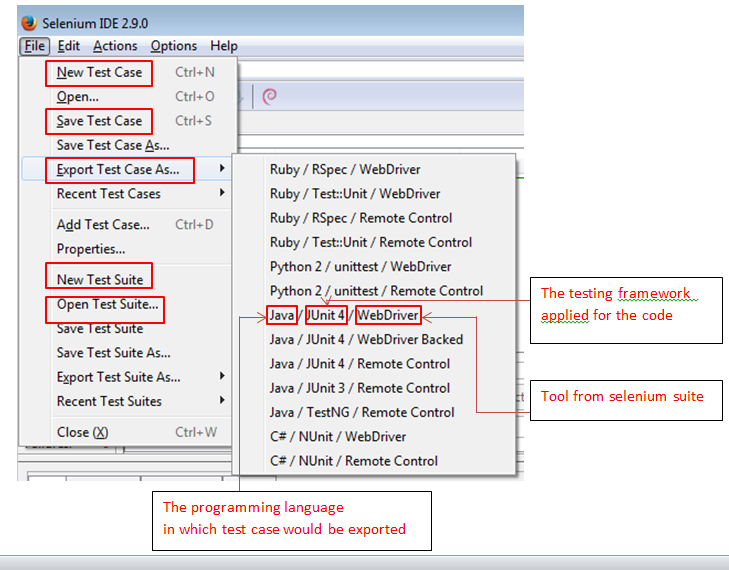
File Menu Explanation:
The purpose of File menu in selenium IDE is similar what you find in other application as well. By going to File menu, you can create,open and export test cases. The options available in File menu are as follows.
- Create New Test case
- Open Test case
- Save Test Case
- Export Test case (We can export the test case in desired language and framework as shown in figure)
- Create Test Suite
- Open ,Save and Export Test Suite
We will learn in later part how to create test cases and Test Suite.
Edit Menu:
Edit menu provides the options like Undo, redo, cut, copy , paste ,delete and select all which are useful while editing the script or test case.

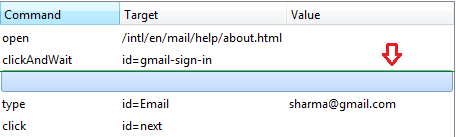
- Insert New Command: By using this option, we can insert a new command any where in the Test case.Select the step, above which you want to insert the new command and click on “Insert new Command“.
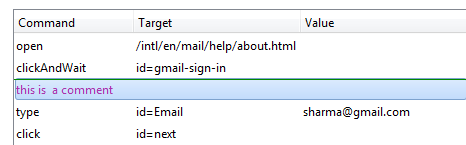
- Insert New Comment: By using this option, we can insert a new comment anywhere in the Test case.Select the step, above which you want to insert the new comment and click on “Insert new Comment“.
Actions Menu:
Actions menu contains option to perform actions on test case like recording, playing, pause etc.
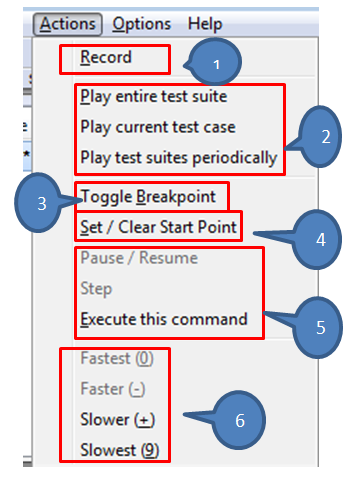
- Click on Record to start recording on any application.
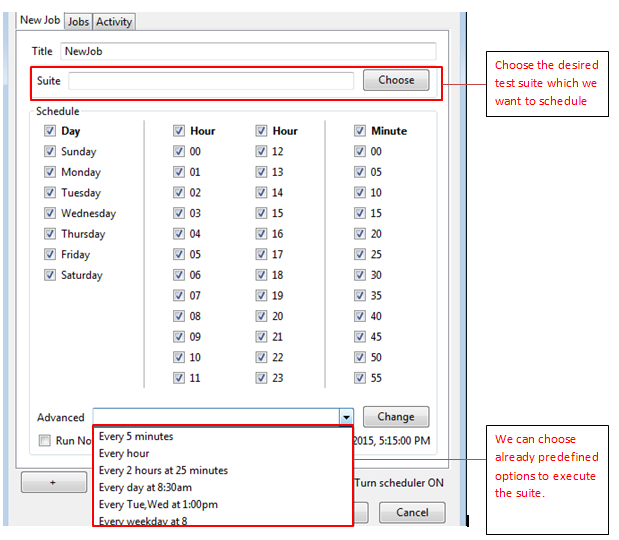
- We can play current test case, current test suite. We can schedule timer for any suite to execute at the defined time.We can select day , hour, minutes as well as some predefined time mentioned in advance drop down( as shown in figure below).
 3. Breakpoint: It can be uesful during debugging script i.e. if we want to pause the script during execution we can apply breakpoint at particualr step.
4. Set/Clear Start point:By using this option we can choose the step from where we to start execution.
5. We have option to pause the test case execution manually bu using pause/resume option.We can also executes a particular step in the test case by using “ Execute this command”.
6. By using these options, we can control the execution speed of test cases.
Options Menu:
Options menu has the following options as shown in the figure below.
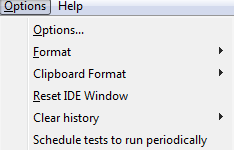
options..:
This tells about the general features used in IDE like default timeout (30 sec), external extensions used, types of format supported, different locators use to identify the elements in the application etc.
- General Tab:
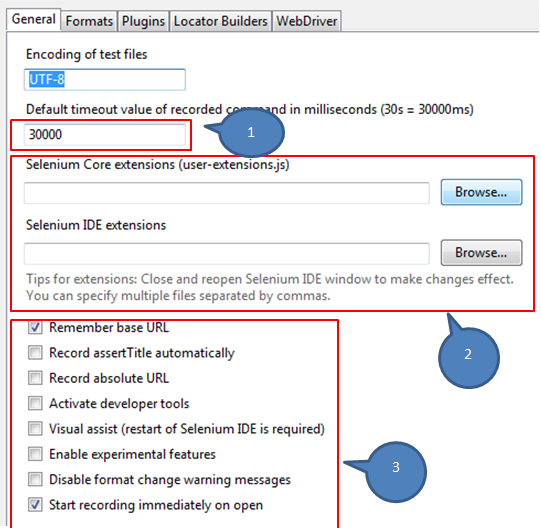
- Default time out which is 30 seconds.
- Extension can be uploaded in selenium IDE to extend more functionality e.g. we can write user defined java script functions.
- Options like we can insert “assertTitle automatically” during recording which will verify if title of teh application is correct or not, “”Record absolute URL” that will show the full path of URL etc.
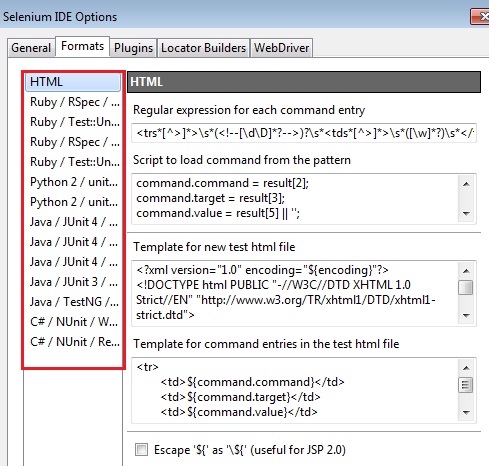
- Format tab: This tab will show all the format supported in selenium IDE , in which the code can be formatted.
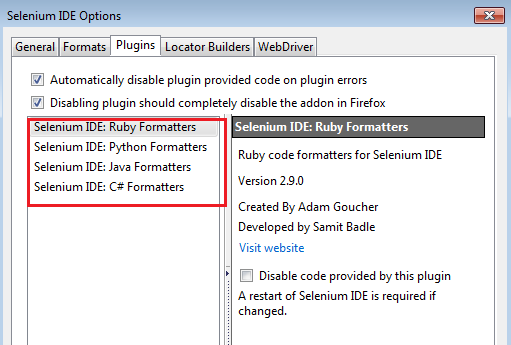
- Plugin Tab: This tab will show all the plugin available in selenium IDE which are nothing but the formatter of different language like ruby, java etc.These formatters are responsible to convert the HTML test cases into the desired programming formats.
- Locator Builders: These locators are used to locate the elements in the AUT(Application under Test) like with the name of the element, id of the element etc.

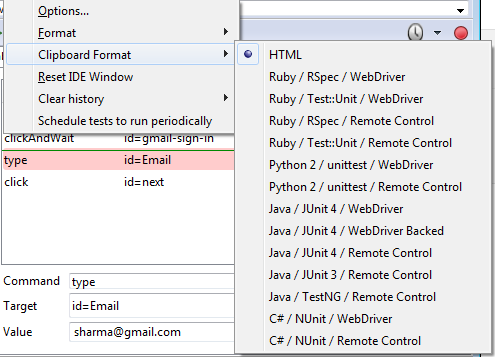
Clipboard Format: This option is used to convert the selenium IDE test case into the desired format.
Reset IDE window: This will bring the IDE as it was new.
Clear History: We can clear history of test cases or the entire suites.
Schedule Test to run periodically : It gives us the options to schedule the execution like which day, what time (hour and minutes) etc.
Help: In this you will find details about the documentation, official blog of selenium IDE, Release Note, Report issue etc.
2. Base URL:
Base URL is the primary URL which will be invoked at the time of execution. We can see open command with a target value . This target value is the extended connection of base URL. That means this target value will open on top of the base URL.

3. Tool Bar:
![]()
The tool bar contains some icons which are used to perform actions like play test case, test suite pause etc. Let’s see them one by one in details below.
![]() Speed bar: This is used to control the speed of execution.
Speed bar: This is used to control the speed of execution.
![]() Play Test Case: It is used to play a particular test case.
Play Test Case: It is used to play a particular test case.
![]() Play Test Suite: It is used to play the entire test suite i.e. all test cases in suite.
Play Test Suite: It is used to play the entire test suite i.e. all test cases in suite.
![]() Step: During execution we can move the next step.
Step: During execution we can move the next step.
![]() Pause: It will pause the execution.
Pause: It will pause the execution.
![]() Roll Up: Combine multiple test steps to act like a single commands.
Roll Up: Combine multiple test steps to act like a single commands.
![]() Test Scheduler : It allows to schedule the test suite periodically.
Test Scheduler : It allows to schedule the test suite periodically.
![]() Record: It allows to start and stop the recording.
Record: It allows to start and stop the recording.
4. Script Editor:

Editor shows the recorded steps and when right clicked it shows the options to cut,copy ,paste,Insert new command/comments, execute commands etc.
We have 2 views in editor.
- Table View: All recorded steps are seen as table form having the columns Command, Target and value. Command is Action which we want to perform, Target is item on which we want to perform the Action and Value is input given in the target if any.
- Source View: In this view, the same recorded steps are seen in XML form.
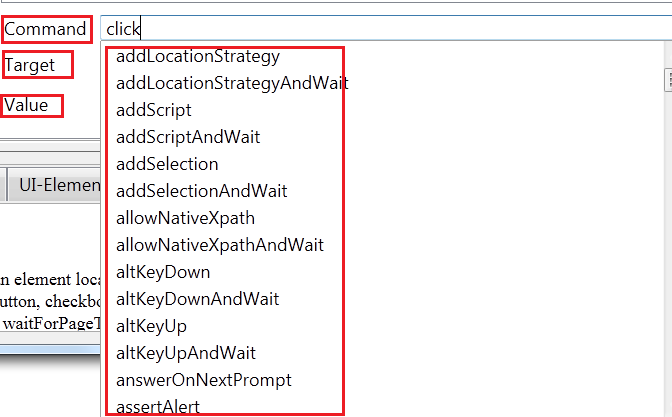
5. Instruction Fields:
There are fields which allows us to write the code without recording. There are 3 fields like.
- Command: It allows us to add the actions that needs to be performed.
- Target: It allows us to add the target which are nothing but the locators like Id, name ,xpath with their values.
- Value: It accepts input which needs to be passed into target.
6. Test Pane:
Test pane will show all the test cases and Test suites.
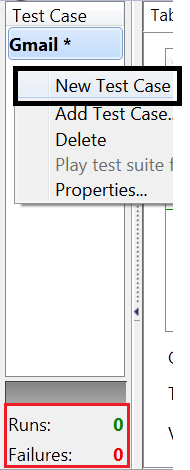
We can add new Test by right clicking on the Test pane as shown above and then you can record the required steps.
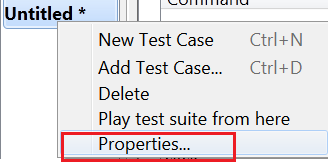
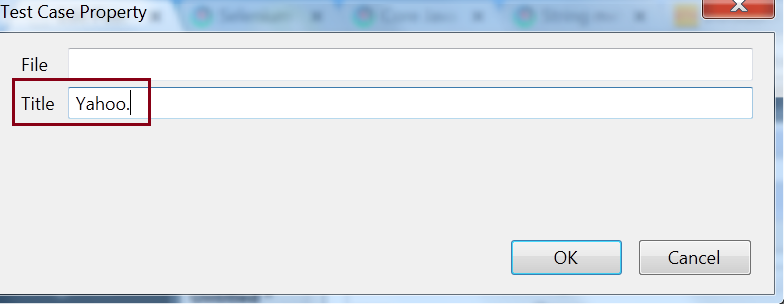
If we want to change the name of the Test case, then right click on the test case and select properties. Change the title in the properties dialog box as shown below.
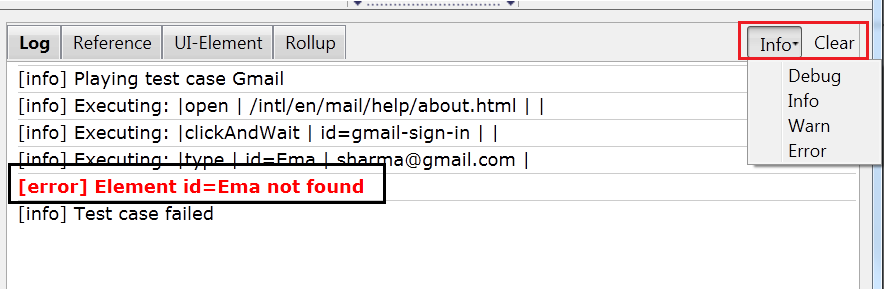
7. Logging pane:
This pane helps to debug ,look for error, warning and other general information. We have an options to select for specific type of information like only warnings, only errors etc. For that we can choose the option from right top corner of the window. We can clear all the information if required as shown in figure below.
Rest of the tutorial,we will see in the next part 2. Where we will see how to add a new test case, record a small program, create a test suite etc.

1 Response
[…] test case will not have any name. You can change the name of the test case( as shown in the part 1). We have given the name Gmail to the test […]